Software: No-IP, PostgreSQL, and Commento.
5. Free Web Address
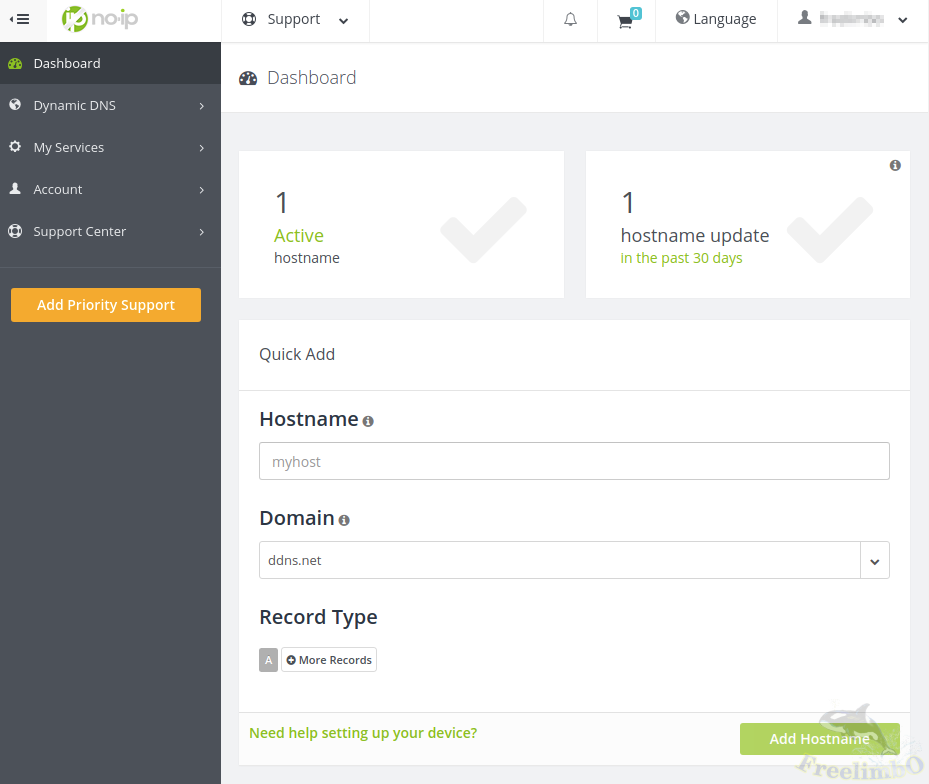
If, like me, your home internet connection only has a dynamic IP address but you still want to share your website with friends who live elsewhere, you’ll need to obtain a web address that can be found on the internet. This can be achieved through No-IP, a third-party service.We need to register an account at [No-IP](https://www.noip.com/
), then enter your website name in the “Quick Add” section of the Dashboard. I entered<the site name>
from the previous post, then selected a domain name you like from the list below. Click the green “Add Hostname” button to claim this URL. A free account allows you to create three URLs.You can view the created URLs by clicking the “Dynamic DNS” tab on the left. The downside of a free account is that it doesn’t support HTTPS, and you’ll need to check your email every 30 days to click the renewal confirmation button to ensure your readers can continue accessing your blog via the same URL (this doesn’t quite align with this site’s original vision, but since it’s free, we’ll make do with it).
|
|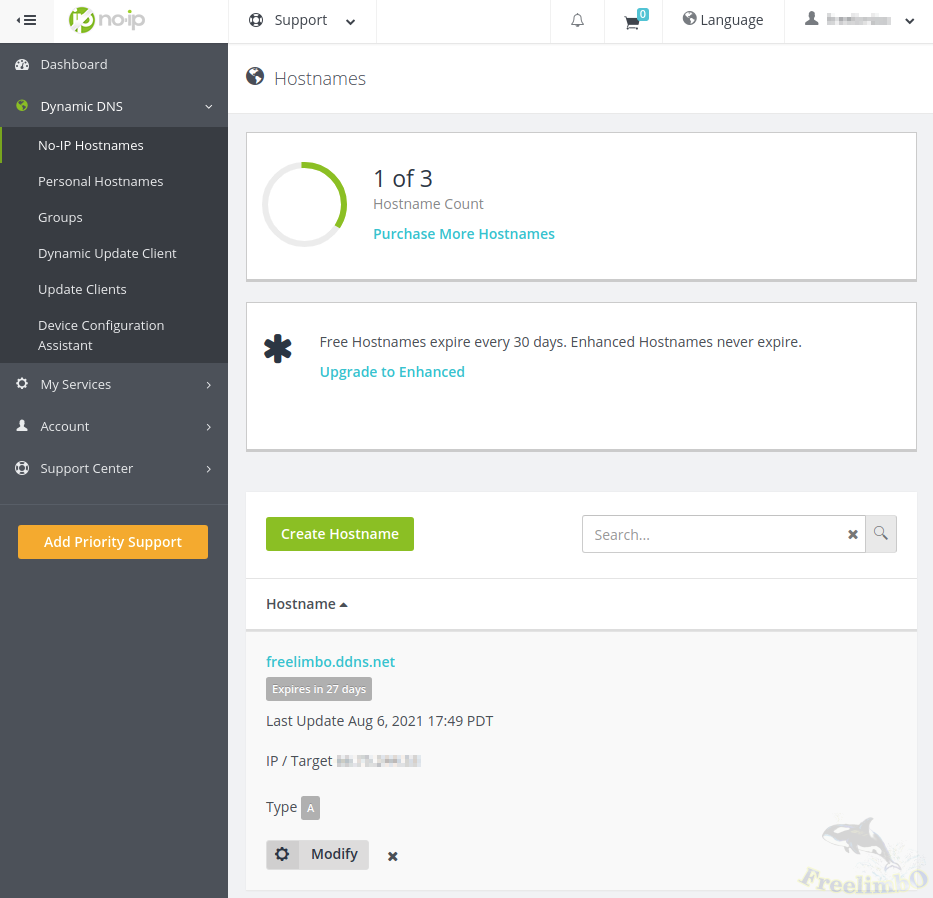
| no-ip dashboard | no-ip ddns |
Even after setting up your own URL, you still can’t access the Raspberry Pi through it. You must install the Dynamic Update Client (DUC) on the Raspberry Pi to report your home’s dynamic IP address to No-IP.After logging into the Raspberry Pi, enter `
$ sudo mkdir <no-ip folder>; cd <no-ip folder>
$ wget http://www.noip.com/client/linux/noip-duc-linux.tar.gz
$ tar -xvf noip-duc-linux.tar.gz
$ cd no-ip-2.1.9-1; make install
. The first three lines download and extract noip2 into the folder we created to store the No-IP code: ``<no-ip folder>
. However, this is just the source code; we must compile it on the Raspberry Pi to get the application. The fourth line enters the extracted folder and compiles the code; once compilation is complete, it is automatically installed to /usr/local/bin/`.Next, configure noip2:
$ /usr/local/bin/noip2 -C
. You’ll need to enter the username and password you registered on the No-IP website, along with the URL of the blog you just created. The official documentation mentions that the README explains how to set up a noip2 service to start automatically at boot, but I wasn’t able to follow those instructions successfully. So, I created a simpler service on my own:
sudo vi /etc/systemd/system/noip2.service
Paste the following lines into an editor:
[Unit]
Description=noip2 service

[Service]
Type=forking
ExecStart=/usr/local/bin/noip2
Restart=always

[Install]
WantedBy=default.target
Save and exit, then enter the following in the command line:
$ sudo systemctl start noip2
$ sudo systemctl enable noip2
This ensures that systemd runs the noip2 service automatically at every boot to update our home’s dynamic IP with No-IP. You should now be able to see your home’s dynamic IP updated for the URL you created under the DNS tab at www.noip.com網頁的Dynamic.
At this point, you still cannot access your blog from the external network using the No-IP address you created. You must also open your home router’s control panel to set up port forwarding. Typically, you can log in to the router by entering192.168.0.1
in your browser’s address bar.Once logged in, look for “Port Forwarding” under “Advanced Settings.” We need to forward the Raspberry Pi’s internal IP address and the port 1313 used by the Hugo server to external port 80.
|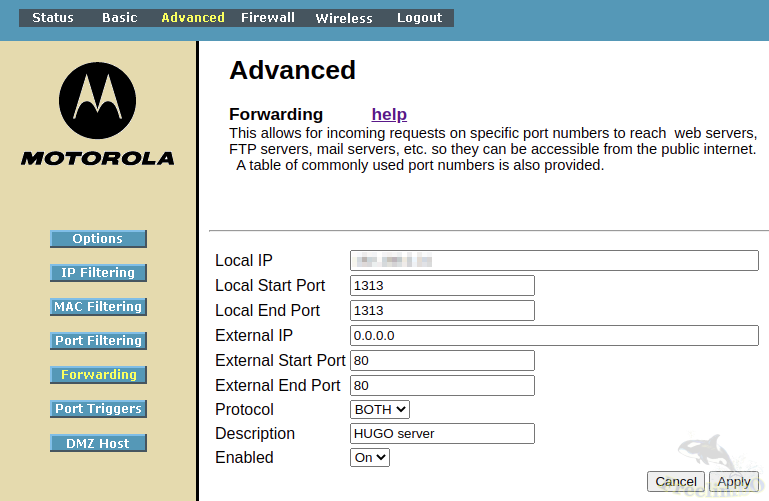
| Motorola router port forwarding |
The port forwarding settings for my router are shown in the image above. This way, anyone outside your home network who enters the No-IP address you provided will be directed to your home’s dynamic IP port 80. The router then relays the external request for port 80 to the Raspberry Pi’s
on port 1313, matching all the HUGO server’s settings.
6. Comment Section
After seeing the super basic blog I’d cobbled together, a friend asked if there was a place to leave feedback.That’s when I realized that while most blogs have comment threads under posts, Hugo is a static site generator (SSG) that only serves static pages. Allowing visitors to leave comments would effectively involve modifying the page content—something Hugo doesn’t handle. So, we need to rely on a third-party “Commenting Service” to fill this gap. The most widely used open-source, free commenting services online are [Disqus](https://blog.disqus.com/
) and [Commento](https://commento.io/
).There are many other options, such as Facebook’s free Facebook Comments, as well as paid services like Talkyard, Staticman, or GraphComment. However, my goal in setting up this blog is to use free software as much as possible to achieve all the necessary functionality, so the only options left on my table are Disqus and Commento.
After doing a bit of research, I found that online reviews suggest Disqus is easier to set up. However, its glory days are over—since being acquired by an advertising company, it tracks user cookies to serve ads, which has turned many people off.So I decided to give Commento a try—it’s a bit tricky to install but is completely free, open-source, and doesn’t track users. Even if it isn’t very fancy, I’m fine with it as long as it offers basic commenting functionality. After all, Chairman Wu’s philosophy in pharmaceutical development is to prioritize safety over efficacy.
Commento’s system requirements include a PostgreSQL database server, and Commento itself also starts a server to access the PostgreSQL server.Here’s how it works: whenever a reader leaves a comment under one of my posts, the Hugo server requests that the Commento server update the webpage. The Commento server then accesses the PostgreSQL server to write the reader’s comment into the database. This allows other users to read the comment later, and Commento generates the comment thread before sending it back to the Hugo server to regenerate the page.
If you add the original HUGO server to this, that makes three servers to run. Well, to allow future readers to leave comments and provide feedback, I’ll just have to take a gamble and see if cramming all three servers into a Raspberry Pi won’t cause it to catch fire.You see, in my first post about hardware pitfalls, I decided to use a fanless all-aluminum case to rely on room temperature for cooling, all in the name of power efficiency and silence. If one day tens of thousands of people flood in and start commenting like crazy… hang in there, don’t die on me, Raspberry!
$ sudo apt install postgresql
Install PostgreSQL with this command, then proceed with configuration:
$ sudo -u postgres psql
This line starts the psql database as the postgres user. The command prompt will then change to “postgres=#”; we’ll omit the “#” here:
# create database commento_db;
# create user commento_user with encrypted password '12345';
# grant all privileges on database commento_db to commento_user;
# \q
This creates a database named commento_db for “commento,” as well as a user named commento_user with privileges to query and sort all databases, with the password set to 12345.Readers can modify these names and passwords as they see fit, but note that usernames are case-insensitive, whereas passwords are case-sensitive and must be enclosed in single quotes. Since I was unfamiliar with database syntax, I got stuck here for quite a while. By the time I realized the case sensitivity issue, I had already wasted nearly two hours—a real pitfall for beginners!
After escaping the dreaded database command line, there are two more files to modify so that the Commento server can properly access the PostgreSQL server. Open `
$ sudo vi /etc/postgresql/11/main/postgresql.conf
and add
listen_addresses='*'
at the end of the file to allow connections from all IP addresses.If you need to change the PostgreSQL server’s port, you can also modify the line ``port = 5432
, but make sure to note down any changes so you can enter them later in the Commento server’s settings. There’s also a file related to user permissions that needs editing:
sudo vi /etc/postgresql/11/main/pg_hba.conf
. Add
host all all 0.0.0.0/0 md5
` at the end of the file to grant access to all clients.You might wonder why the database server settings seem so loose and permissive. The answer is that this PostgreSQL server will only be open to the internal network, allowing access only from the Commento server. While there is always a risk of intrusion, it is relatively low. If you’re still concerned, you can come back and restrict the PostgreSQL server’s access scope after all Commento configurations are complete. Next, start PostgreSQL.
$ sudo ufw allow 5432
$ sudo systemctl start postgresql
$ sudo systemctl enable postgresql
The first line opens port 5432 on the Raspberry Pi, and the next two lines start the PostgreSQL server to wait for Commento to connect. This completes the prerequisites mentioned on the Commento official website (or does it?). I initially thought so too.
Commento offers three installation methods: running the official pre-compiled binaries, using Docker to skip the installation process, and downloading the source code to compile on your own machine.Unfortunately, I couldn’t find a version suitable for the Raspberry Pi on the official [Using Release Binaries](https://docs.commento.io/installation/self-hosting/on-your-server/release-binaries.html
) page. The second method requires the Raspberry Pi to run Docker, but I’d prefer to run native applications to avoid overburdening the device, so that leaves only the third option: compiling the executable from source code on the Raspberry Pi itself.Alright, let’s do this—I’m counting on you, little Raspberry (pats on the shoulder).
$ sudo apt install build-essential golang go-dep
$ mkdir <commento project>; cd <commento project>
$ git clone https://gitlab.com/commento/commento.git
$ cd commento
$ make prod
The first line installs Go. Actually, I had already installed Go earlier to set up Hugo, but I wasn’t sure if Hugo required Go to run, so I’m including this here for those who haven’t installed Go yet.Lines 2 through 4 fetch the Commento source code, and the last line compiles the Commento build. However, an error message appeared shortly after the compilation started. This process requires Yarn, which wasn’t installed on my Raspberry Pi yet, so I ran ``$ sudo apt install yarn`
. Then, absurdly enough, when compiling to ``yarn install
, I got the error: "No such file or directory: 'install'". It took me ages to figure out that installing Yarn via apt also installs cmdtest, but you can’t simply remove cmdtest. Fortunately, someone discovered that after removing the cmdtest and Yarn installed by apt, using ``sudo apt-get install yarn
` instead resolves the error. (Rolling my eyes)
After successful compilation, the executable file commento` ` will appear in the build/prod/ folder. Next, we need to set some environment variables for commento so it knows where to receive database query, update, and delete requests, and where to locate the database.Here, I’ll directly add the environment variable settings to the Bash configuration file `
$ vi ~/.bashrc
. After opening the configuration file, add the following lines to the end of the file:
export COMMENTO_ORIGIN=http://<your site's no-ip address>:<WAN port for commento>
export COMMENTO_BIND_ADDRESS=<the designated LAN ip>
export COMMENTO_PORT=<LAN port for commento>
export COMMENTO_POSTGRES=postgres://commento_user:12345@<the designated LAN ip>:5432/commento_db?sslmode=disable
export COMMENTO_FORBID_NEW_OWNERS=false # Allowing registering new user
#export COMMENTO_FORBID_NEW_OWNERS=true
`. The first line sets the URL and external port for accessing the Commento server from the internet. That’s right—Commento also generates a webpage, which serves as our Commento backend. It can share the same domain as the blog, but the ports must not conflict.Here, I’ve entered the URL created on No-IP and a port other than 80, since I want to reserve port 80 for the blog server. The second and third lines bind the Commento server’s local network address to the Raspberry Pi’s IP address and assign it a port different from the Hugo server’s—so avoid using 1313 here.The fourth line tells Commento where to find the PostgreSQL server. It’s also on the Raspberry Pi, so it uses the same local network address but port 5432. I’ve also included the database username, password, and database name in this line. See,this also exposes the database server’s credentials. Fortunately, we don’t need to make the database server publicly accessible; otherwise, every time a reader leaves a comment, the system would have to ask us for the database server’s username and password. You only need to comment out one of the fifth and sixth lines at a time. The fifth line is only used when logging into the Commento admin panel locally to create an administrator account; otherwise, use the sixth line to prevent the creation of new administrator accounts.Save and exit after editing.
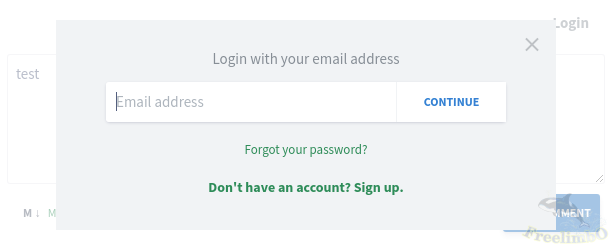
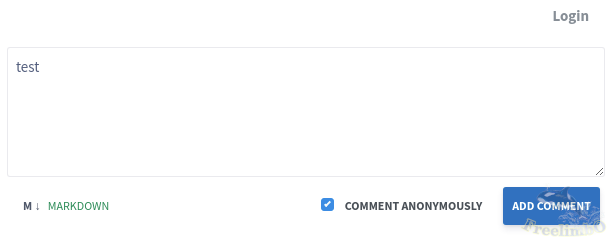
You might ask, “How do casual readers leave comments?” It’s simple: users without an account can register one before commenting. They just need to provide an email address, set a password, and choose a display name. If a reader insists on not creating an account, they can check the “Anonymous” option to leave a comment. The two options are shown in the image below.
| |
|
| Commento: Register to comment | Commento: Anonymously comment |
Next, we can start the Commento server. Assuming we’re still in the commento folder, run the following command: `
$ source ~/.bashrc
$ sudo ufw allow <LAN port for commento>
$ ./build/prod/commento
. The first line applies the environment variables, the second line opens port
Open a browser, enter your router’s IP address in the address bar, and set up a port forwarding rule for the Commento server. The external port is<WAN port for commento>
, the internal address ishttps://<your site's no-ip address>:<WAN port for commento>
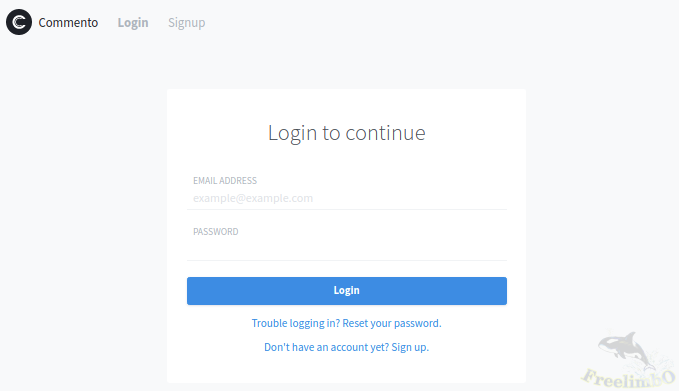
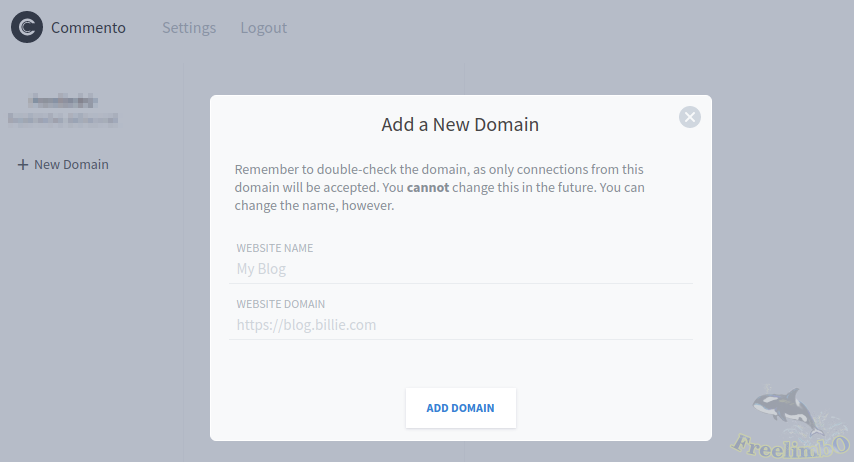
to view Commento. Create an administrator account and log in. Click “+ New Domain” on the right, then enter your website name and No-IP address. After filling in the details, click “ADD DOMAIN.”
| |
|
| Commento: Owner login page | Commento: Add domain |
After adding the Commento domain, click on the newly created domain on the left side of the page. You’ll see a “Universal Snippet” line under the “Installation Guide” tab. If you embed this HTML code into your Hugo theme, a comment section will appear below each post.
|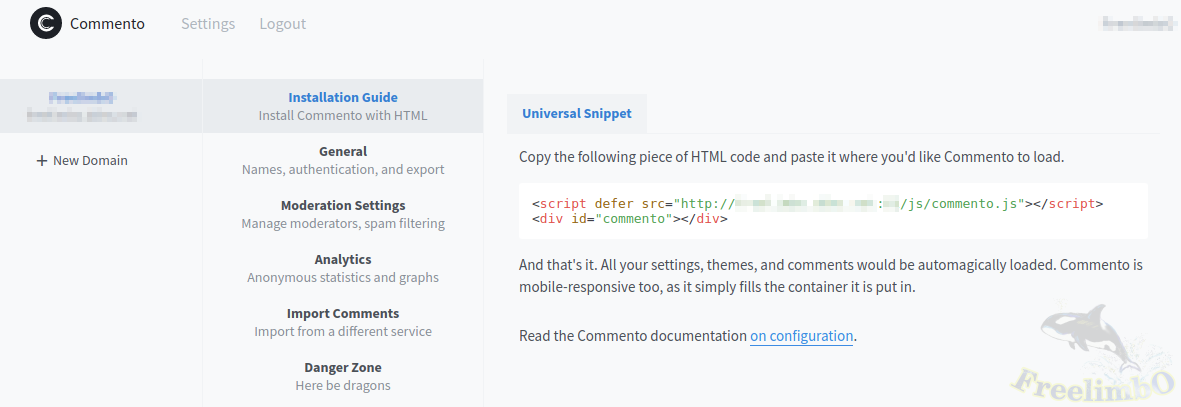
| Commento: Installation Snippet |
After copying this HTML code, you need to edit the Hugo theme file `
$ vi ./themes/<your theme's name>/layouts/_default/single.html
and paste the copied code between the lines ``{{ .Content | emojify }}
and ``</article>
`. Now, comments are enabled below every one of your posts.